01 December 2011

The Saddle Bag: a first draft

saddlebag front
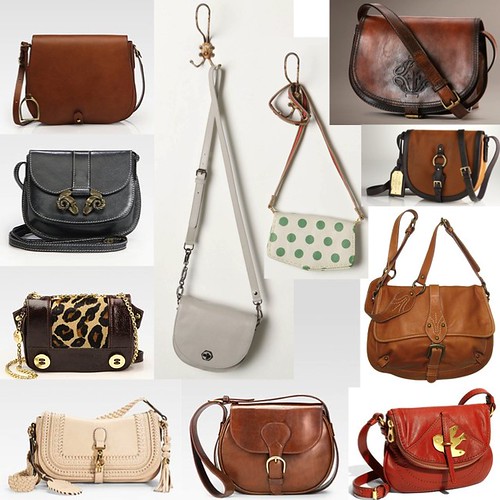
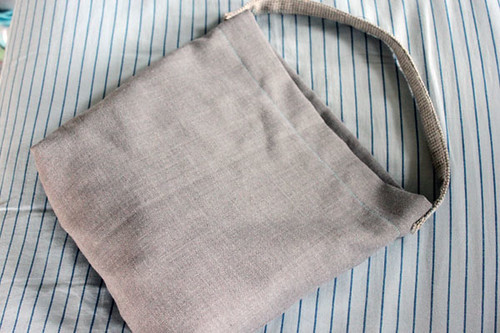
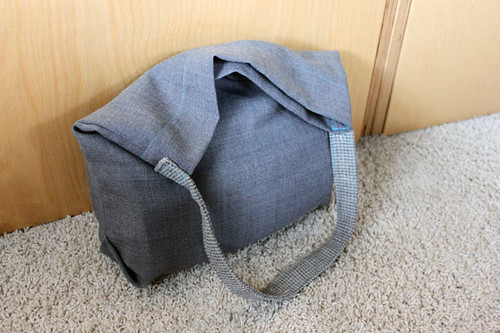
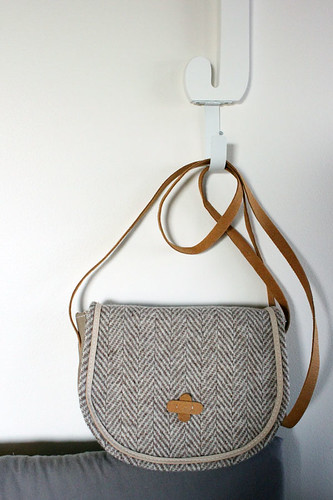
The Alpine Adventure Saddle Bag

After much ado, here is the first draft of my saddle bag.

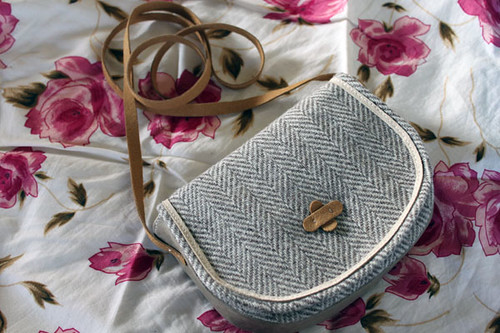
My husband thinks it belongs in the Swiss Alps, so I have aptly named it the Alpine Adventure Saddle Bag,

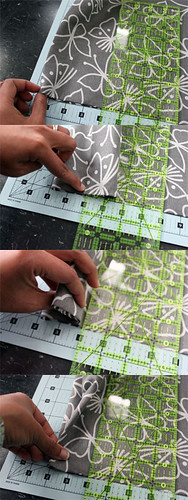
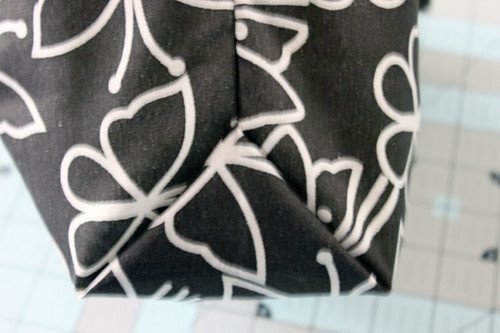
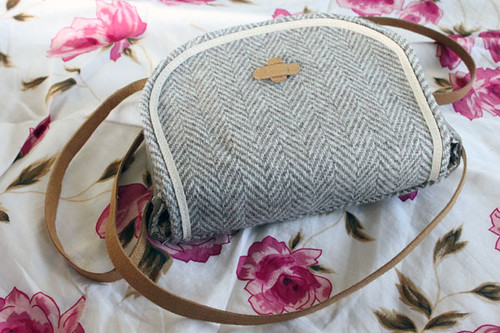
 If you recall my inspiration, it involved traditional shaping, a flap, and leather.   But I also incorporated wool with a herringbone pattern in the main body, 3 different colors of leather (one for the side of the bag, one for the strap, front and back details, and a third for the trim on the flap.

saddlebag back
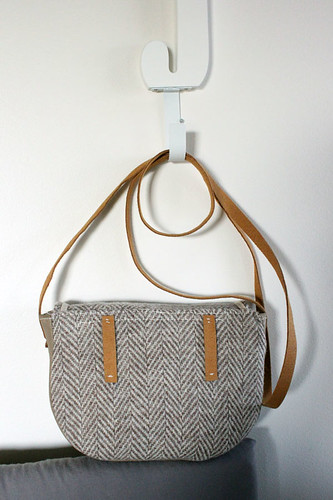
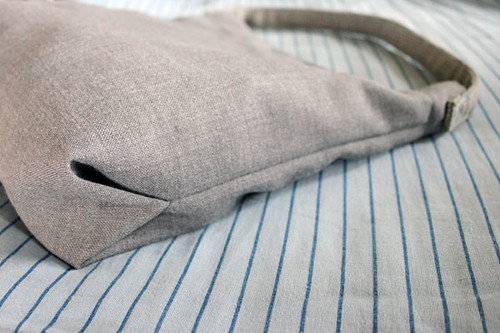
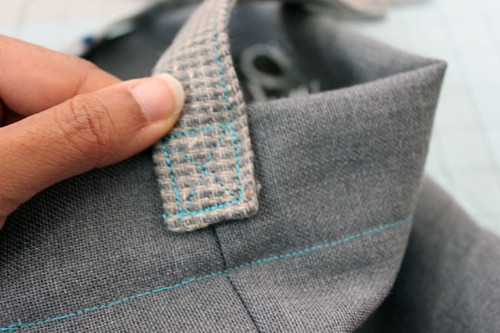
The back has belt loops for completely shoulder-free carrying
saddlebag side
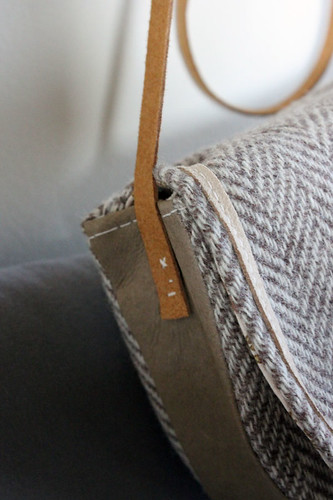
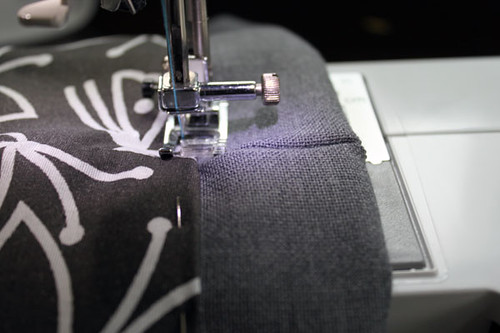
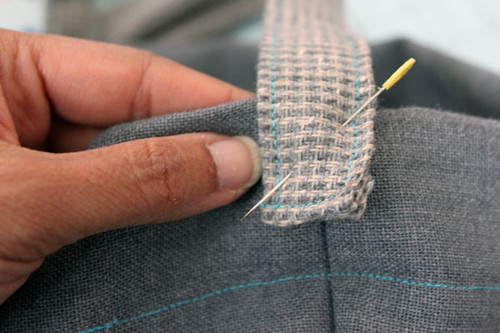
The leather strap was secured with hand-stitching to the leather side
 
saddlebag inside
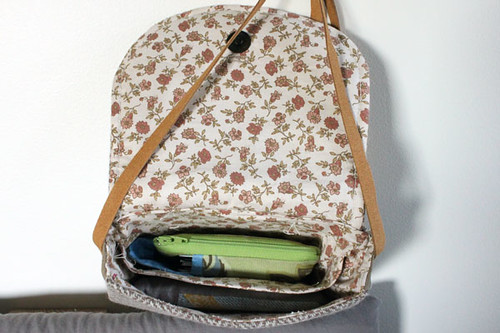
The inside pocket holds my wallet

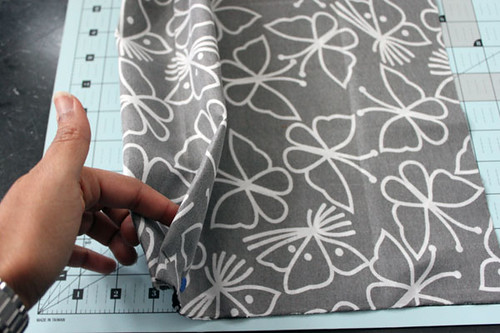
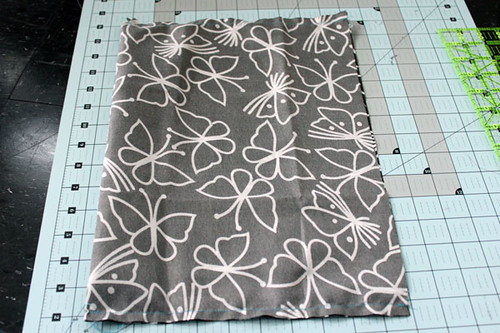
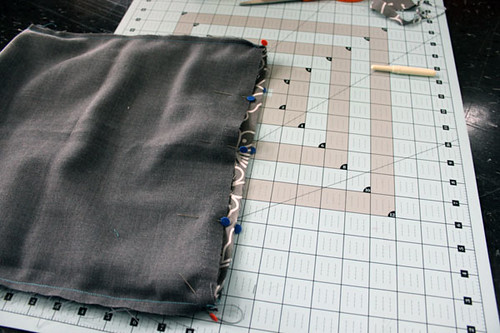
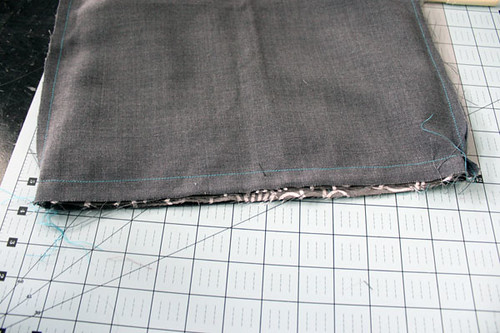
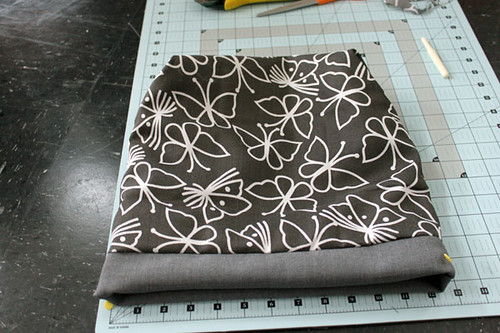
It's a pretty small saddle bag, just large enough to hold my phone, wallet and keys.  I also drafted a larger version, but that one isn't finished yet.  The inside is a floral quilting cotton, and the flap closes with a magnetic snap.

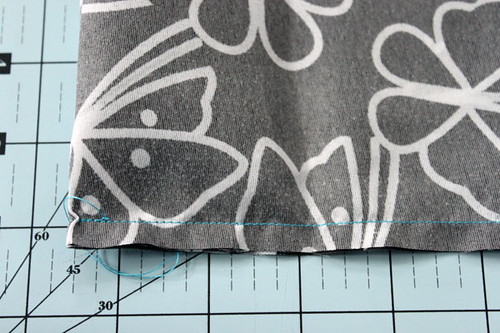
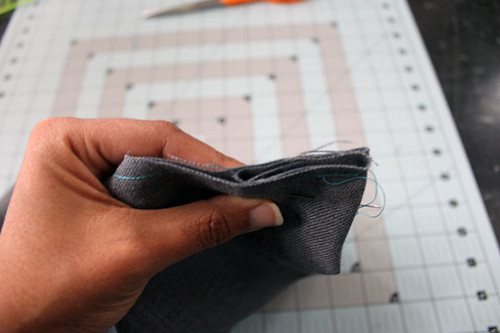
I'm really happy with how it turned out, though I am not yet satisfied with the order of construction.  Too much hand-sewing was necessary on this bag, and the lining was not as tight as I would like on the inside.  I am trying a different construction method on the larger bag, as well as different interfacing.

But I will leave you with a few more pictures of the finished bag anyway.  
saddlebag full
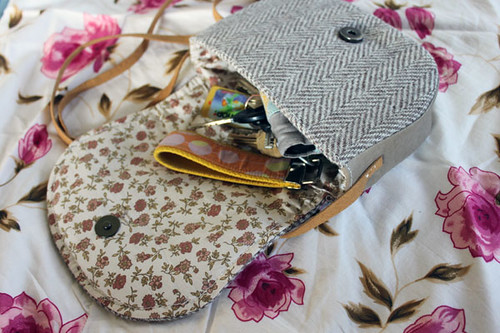
Here you can see my wristlet keychain, courtesy of Keri from Platypus Pouches!
saddlebag bottom
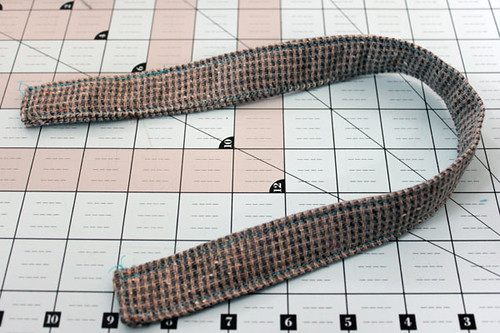
I love how this particular leather strapping is light yet strong
saddlebag top
This bag is also well-sized for a point-and-shoot camera, which does start to make the name "Alpine Adventure" make sense.  Now, I just need to take an appropriate trip!

SHARE:

08 November 2011

Inspiration: Saddlebags

There is a reason why certain bag styles have stood the test of time.  Simple styling, functional design, and durable natural materials are just some of the reasons designers return to these timeless styles every season.

The leather saddlebag is a perfect example:
The saddlebag is a bag designed for utility and traditionally made with leather for durability.
Originally these bags were made to be attached to the side of the saddle when riding horseback.  These days, most saddlebags are made with cross-body straps and worn at the hip.

The smallest ones are a perfect size for carrying the bare necessities (e.g. wallet, chapstick and keys), or small electronics (think small cameras, cell phones, etc.) while the larger ones are useful for larger loads.  Saddlebags normally close with a flap and can be secured with either a buckle (traditional) or a magnetic clasp (modern).

Saddlebags are probably my favorite style of cross-body bag.  Rugged and durable, yet stylish and classy.

I've been working on some travel-worthy saddlebags, incorporating non-traditional materials and construction techniques into this very traditional bag style.

My inspiration (shown above) include the very classic brown leather with buckle variety, but also incorporate some modern elements like the metal embellishments, zippers, polka dots, animal prints, and chains that are present on a few of the bags.

I plan to show you my version soon...


SHARE:

03 November 2011

Oh Deer!

deer ornament
As it turns out, I've been planning some DIY holiday ornaments for a couple months now.  I have an ultimate plan of creating non-breakable and flat-packable ornaments, to save storage space when the holiday season is over.

I began pinning some inspiration on Pinterest knowing that I wanted to create some cute little reindeer ornaments (since they are representative of my last name).

I've had this beautiful red/burgundy leather in my stash for quite a few months, and I just knew I wanted to create some ornaments with it.  Leather is definitely NOT a traditional material for ornaments, but it seemed to be a perfect combination of durable yet "non-breakable and flat-packable".

But what? How?  First, let's look at some of my inspiration...
These little button reindeer from Martha Stewart were just adorable with their pipe cleaner antlers and legs
Here are some adorable leather ornaments, from here 

With these pieces of inspiration in mind, I took my leather, made the cutest little round reindeer shape I could, and added some ribbon collars and floral wire antlers.

deer ornaments deer closeups

I think they turned out quite well, if I do say so myself.  And in the close up picture, you can really see the texture of the 2 sides of the leather.  I love that these little dudes are reversible!

If anyone wants to make some, I can post a pattern and tutorial later.  They could really be made with anything that doesn't ravel, like felt or cardstock or vinyl.

deer ornaments packaged
But for now, these two little dudes are getting mailed to the west coast to live with a friend this holiday season.

And this little post is being submitted to the YHL Pinterest Challenge, so if you are looking for more DIY projects and inspiration, you should definitely check it out.
SHARE:

01 November 2011

Happy Halloween!

Hopefully everyone had a wonderful Halloween (if you celebrate Halloween).  We did some reverse trick-or-treating this year, which involves going door-to-door in costume and giving other people candy.

I made our costumes last year, literally in the course of 5 hours, the day of our friend's Halloween party.  I was a zebra and the husband was a cave man.

zebra halloween costume 
For my costume, I sewed a cylinder of zebra-print fabric, stepped into it, and pinned some darts into it. It was kind of like impromptu draping. Then I attached the neck piece and added a zipper down the back.
  zebra hair 
My hair was transformed into a mane with a banana clip (anyone remember those? they used to be cool in the 80s, and I couldn't believe they still sell them!) 

 But my favorite part of this costume was my purse: baby zebra 
My baby zebra has a secret pocket large enough to hold an ID, my phone, and a couple dollars for a taxi. Perfect for going out in the city! 

 Here is the caveman I married:
  cave man 
His costume was also very easy. Cut a hole for his head, drape the fabric over his shoulders, sew side seams, and cut jagged shapes in the edges. I used some leftover brown corduroy to make a club, which he then stuffed with a wrapping paper roll and some polyfil.  
He also got a matching backpack for carrying his wallet and keys. The backpack really came in handy this year for carrying extra candy while we reverse trick-or-treated.

Anyone else make costumes any costumes, whether for yourself or others?
SHARE:

19 October 2011

easiest tote bag revealed!

Alright! A tutorial for the easiest tote bag!  I wonder if it will live up to its name?
easiest_tote1 easiest_tote2
This bag also happens to be reversible, so you really can have 2 bags in one!


To start, you need to decide what size you want your bag to be.
Mine was 10 inches wide, 11 inches tall, and 4 inches deep.

Next we must calculate the fabric sizes.
There will be 3 pieces: 1 for the outside, 1 for the lining, and 1 for the strap.

The outside and lining pieces can be calculated as such (sorry, but I am an engineer...I like math!):
fabric length = (height x 2) + depth + (2 x seam allowance)
fabric width = width + depth + (2 x seam allowance)

(for my bag, I used 1/2" seam allowances.  this comes out to:
length = (11 x 2) + 4 + (0.5 x 2)  =  22 + 4 + 1  =  27"
width = 10 + 4 + (0.5 x 2)  =  10 + 4 + 1  =  15"
so my outer and inner fabrics would each be 27" by 15")

for the strap, a width of 4" by any desired length (I used 18") will work nicely.

Ok, now that you have your fabric pieces, we can begin construction.

Begin with one of your fabric pieces (I started with my lining fabric), and fold it in half, right sides together.  Now, take the folded edge, and move it up to the desired bag depth (for mine, I moved it 4" for a 4" gusset)

Does this picture help explain?
easiest tote assembly
I like to perform this step with my fabric on my cutting mat, and a ruler held at the top, where I want to move my fold.  

Hopefully you can see from the pictures, that you are moving the fold to be sandwiched in between the 2 sides.

easiest_bag26 easiest_bag27

Once you do this, pin and sew the side seams.
easiest_bag29 easiest_bag28

You will end up with something that looks like this when turned right side out.
easiest_bag30
Repeat with the other piece of fabric.
easiest_bag8
Now you can slide the lining into the outer, right sides together, matching up the top edges and side seams. Pin these together. 
easiest_bag35 

Sew around the top, leaving a 3-4 inch gap for turning.
 easiest_bag37easiest_bag38

Turn right side out and topstitch around edge to close gap. (here you can see how I made the outer wrap around inside the bag, but normally you would just sew along the very top of the bag).

easiest_bag44

Your bag is now done, with the exception of the strap!
easiest_bag40 easiest_bag41

Now you can form the strap.  Fold in half lengthwise and press.  open and fold sides to center.  fold in half again and pin down the length of the strap.  turn the ends in and pin.
strap
Now sew along all 4 sides of the strap, 1/8" from the edge.  Your finished strap should look like this:

easiest_bag59 

Now, pin the strap to the sides of the bag, and sew a square with an X in the middle to secure. easiest_bag61 easiest_bag64

You are all done!  Easy, right?
easiest_tote6 easiest_tote7

Let me know if any of the instructions are confusing, and I can try to clarify.  But I have a feeling that once you make one, you might want to make enough for all your favorite people!

SHARE:

11 October 2011

easiest tote bag

I have long studied traditional northeast prep-style tote bags to gain an appreciation for their appeal to the masses.

You know, the LL Bean style that has been around for like 60 years, that everybody carries? Even Reese Witherspoon?
Reese Witherspoon with LL Bean tote - from here

Have you ever noticed the little triangle on the side of those totes?  Have you ever wondered what kind of crazy sewing machine maneuvering is necessary to make these little triangles?

Well, it just so happens that those triangles are the result of the simplest way to make a gusseted bag!

And it really is SO easy!  As easy as making a non-gusseted tote bag!

Here, let me give you a sneak peak at the assembly...
easiest tote assembly
Did you get it?

Well, no matter...a FULL tutorial for making this bag will be going up this week.  And then you can tell me how easy this method is.  I'm pretty sure it might be the easiest tote bag ever!
SHARE:

08 October 2011

Google mapping

This picture might not look like much, but it is pretty significant to my husband and I.


This is the google map satellite image of our wedding.  Do you see the rows of chairs set up on the terrace?  This is the only time in the 10 years this building has existed that chairs were arranged like so.

Which means, the last time they took a satellite picture of our building was on our wedding day. OUR wedding day is captured on google maps.

Now, based on the shadows provided by the sun, we can estimate the time of the picture to be around midday, 1pm-ish.  Right after everything was setup, but before our 4:20pm wedding.

If only it were a couple hours earlier or later, there would have been people pictured.  Family members and friends.

You might have seen my now husband showing our awesome officiant where he would be standing.
You might have seen my aunts stringing tulle along the chairs.
You might have seen us taking pictures with our entire family in front of the building.

You would not have seen the ball pit, but that can't be seen by satellite.

But I still think it's pretty cool that our wedding made it into google history.  What do you see when you google map your residence?
SHARE:

04 October 2011

A momentous occasion...


For the past few years I have been trying to collect my favorite childhood Disney movies on DVD.  What makes this goal complicated is the Disney Vault, the place that Disney executives take good movies so they can keep demand up.  It is an evil scheme, but one that I have paid close attention to.

For instance, I very quickly scooped up Fantasia when it came out of the Vault in April, and Beauty and the Beast in August.

But I have been waiting...patiently...for the past 3 years... for my favorite movie of all time, The Lion King, to finally return from the Vault.

Well, it was announced in July, that it would be released TODAY, October 4.  I pre-ordered it in July, and have been patiently waiting for it to arrive.

Then this weekend, my patience ran out.  We went and saw it at the movie theatre in 3D on Saturday.  It was just as I remembered (minus the 3D part).
(though it did cost more fore 2 people to see it in the theatre, than to purchase the movie in DVD+Blu-ray+3D+digital copy format.)

ANYWAY, it comes out TODAY.  It should be in my mailbox TODAY.  I plan on watching it at least a dozen more times.

Are there any movies you feel this passionately about?  Or am I the only crazy Disney movie collector in the world?
SHARE:

26 September 2011

playing with leather

woven leather bracelet

It was almost a year ago that I bought this piece of yellow suede leather, without having any purpose for it, just because it was the softest piece of leather I had ever laid my hands upon.

leather fringe earrings

I finally got brave enough to cut into it and start playing.

leather feather earrings

I started making jewelry because this leather is light as a feather and so soft, that it must be meant to live next to the skin.

playing with leather

But i still have plenty extra leftover.  Any ideas for what to do with the softest suede leather that ever existed?
SHARE:
Related Posts Plugin for WordPress, Blogger...
Blogger Template Created by pipdig